
I used to think that if I wanted to compost, I’d need to buy one of those expensive, high-tech rotating tumblers that promised to turn kitchen scraps into black gold overnight. But after years of watching over-engineered gadgets fail in my own backyard, I realized that most people make the same mistake: they prioritize complexity over functionality. Learning how to make a compost bin doesn’t require a massive investment or a degree in biology; it just requires a system that works with your existing workflow rather than adding another chore to your list.
In this guide, I’m going to show you how to build a rugged, low-maintenance bin using basic materials you likely already have in your garage. I’m stripping away the fluff and the expensive nonsense to give you a straightforward, manual approach that actually produces results. We’ll focus on building something durable that integrates seamlessly into your garden, helping you turn waste into fuel without the unnecessary friction.
Table of Contents
- Step-by-Step Instructions
- Mastering the Composting Materials Ratio for Real Results
- Optimizing Aeration for Compost Bins Without the Hassle
- Three Ways to Keep Your System Running Without the Headache
- The Bottom Line: Keep It Simple and Keep It Moving
- The Philosophy of the Bin
- Getting Your System Running
Guide Overview
Tools & Supplies
- Drill with paddle bit for making ventilation holes
- Handsaw or utility knife for cutting materials
- Measuring tape for accurate dimensions
- Plastic storage bin (18-30 gallons)
- Drill bits (1/4 inch or 1/2 inch)
- Fine mesh or screen (to prevent pests)
- Shovel or trowel for mixing
Step-by-Step Instructions
- 1. First, you need to scout a location that actually makes sense for your daily workflow. Don’t tuck it away in a far corner of the yard where you’ll eventually forget it exists; place it somewhere accessible from the kitchen, ideally in a spot that gets a mix of sun and shade. You want a level patch of ground that allows for direct soil contact, which is critical for the worms and microbes to migrate up into your pile and get the engine running.
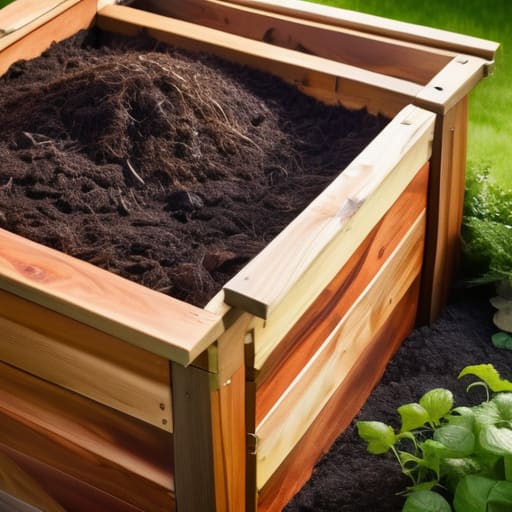
- 2. For a low-friction build, I recommend a simple three-sided wooden bin using untreated cedar or heat-treated pallet wood. Grab four sturdy 4×4 posts for the corners and some slats to fill them in, but leave small gaps between the boards. This isn’t a storage unit for your winter tires; it needs constant airflow to prevent the whole thing from turning into a smelly, anaerobic mess.
- 3. Once the structure is upright, it’s time to prep the base with what I call the “foundation layer.” Start by throwing down a thick layer of coarse organic matter—think small twigs, dried stalks, or even some old, shredded cardboard. This creates a buffer zone of air at the bottom of the bin, ensuring that oxygen can circulate even when the pile starts to get heavy and dense.
- 4. Now, you need to manage your inputs using a simple ratio to keep the system balanced. Think of it like a basic logistics problem: you need a mix of “greens” (nitrogen-rich scraps like coffee grounds or vegetable peelings) and “browns” (carbon-rich materials like dried leaves or sawdust). Aim for a roughly three-to-one ratio of browns to greens to keep the decomposition steady and prevent odors from becoming an issue.
- 5. As you add your layers, try to keep the pile somewhat moist, similar to a wrung-out sponge. If it’s too dry, the microbes go dormant and nothing happens; if it’s too wet, it’ll start to stink. I usually keep a small watering can nearby or just use a bit of leftover rainwater to ensure the core stays active without turning the whole bin into a swamp.
- 6. Every couple of weeks, you’ll need to give the pile a quick “maintenance check” by turning it with a pitchfork. You aren’t looking to move every single piece, but you want to redistribute the moisture and pull the material from the outer edges into the center. This introduces fresh oxygen, which is the fuel that keeps the breakdown process moving at a decent clip.
- 7. Finally, resist the urge to over-tinker with it. The goal of a good system is to work in the background with minimal intervention. Once you have your layers established and your rotation schedule set, just treat it as a routine task—like taking out the trash—and let the biology do the heavy lifting for you.
Mastering the Composting Materials Ratio for Real Results
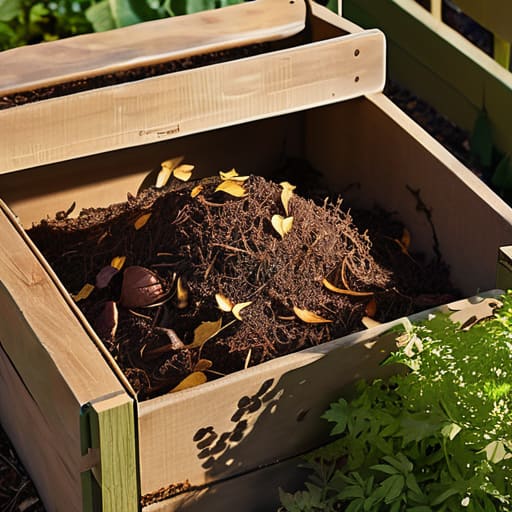
Once your bin is built, the real work begins with what you actually put inside it. Most people fail because they treat composting like a trash can rather than a biological system. To keep things from smelling or turning into a slimy mess, you have to respect the composting materials ratio. Think of it as a balance between “greens” (nitrogen-rich scraps like coffee grounds and vegetable peels) and “browns” (carbon-rich materials like dried leaves or shredded cardboard). If you lean too hard into the greens, you’ll end up with a nitrogen overload that reeks; if you go too heavy on the browns, nothing will happen at all.
I’ve found that the most efficient way to manage this is to keep a dedicated bucket of dried leaves or shredded paper right next to your bin. Every time you toss in a bowl of kitchen scraps, throw in a handful of those browns to maintain the balance. This simple habit ensures proper aeration for compost bins by creating air pockets within the pile, which is essential for the microbes to do their job. It’s not about being a scientist; it’s just about maintaining the right equilibrium so the system works for you, not against you.
Optimizing Aeration for Compost Bins Without the Hassle
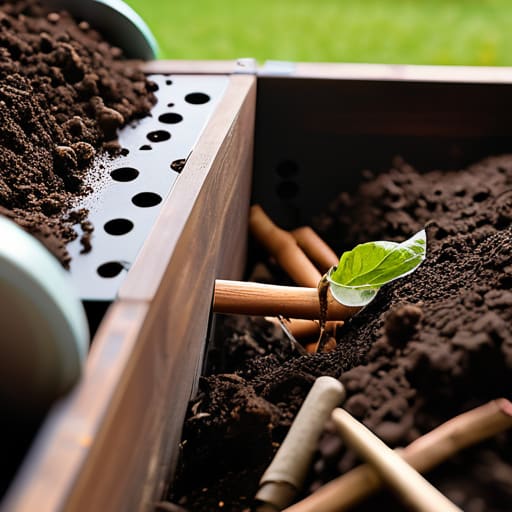
If you’ve set up your bin correctly but notice a sour smell or a sludge-like texture, you’ve likely run into an oxygen problem. Proper aeration for compost bins isn’t about buying a motorized turner; it’s about managing airflow so the microbes can actually breathe. I’ve found that the simplest fix is to incorporate a few sturdy sticks or even some PVC pipe scraps with holes drilled through them into the center of your pile. This creates a “chimney effect,” allowing air to penetrate the core without you having to manually flip the entire mass every single day.
Don’t let the pile become a compacted mess. If you see the material settling too tightly, grab a pitchfork and give it a quick, superficial stir once a week. This breaks up the clumps and keeps the decomposition process explained in my previous section moving at a steady, efficient pace. Remember, the goal is a controlled burn of organic matter, not a stagnant swamp. Keep it loose, keep it moving, and let physics do the heavy lifting for you.
Three Ways to Keep Your System Running Without the Headache
- Location is everything. Don’t bury your bin in a remote corner of the yard just because it’s “out of sight.” If it’s a chore to walk to, you won’t use it. Place it somewhere accessible—near the kitchen door or the garden path—so that dropping in scraps becomes a seamless part of your daily flow rather than a weekend project.
- Build for accessibility, not just aesthetics. When you’re constructing the bin, make sure you can actually get a pitchfork or a shovel into it easily. If you build a tight, enclosed box with no way to reach the center, you’ll end up fighting the pile instead of managing it. Leave room for yourself to work.
- Start small to avoid burnout. I see people building massive, three-bin systems before they’ve even mastered a single bucket. If you’re new to this, keep your footprint small. A compact, efficient bin is much easier to turn, monitor, and manage than a sprawling heap that quickly becomes an overwhelming chore.
The Bottom Line: Keep It Simple and Keep It Moving
Don’t get bogged down in the science; just focus on maintaining that balance of greens and browns and making sure there’s enough air in the pile to keep things from stagnating.
Remember that a good system is one you actually stick to—build a bin that fits your space and your schedule, not one that becomes another chore on your to-do list.
The Philosophy of the Bin
A compost bin shouldn’t be another project on your to-do list that demands constant attention; it should be a silent, efficient system that turns your kitchen’s leftovers into garden gold while you focus on everything else.
Gregory Scott Miller
Getting Your System Running
At the end of the day, building a compost bin isn’t about engineering a masterpiece; it’s about setting up a reliable loop. You’ve got your structure built, you’ve mastered the nitrogen-to-carbon ratio, and you know how to keep the air flowing through the pile. If you stick to these fundamentals, you aren’t just managing waste—you are building a closed-loop system right in your own backyard. Don’t let the fear of a little mess stop you. Once the process takes hold, the bin starts doing most of the heavy lifting for you, turning your daily scraps into something truly valuable.
My advice is to start small and stay consistent. You don’t need a massive industrial setup to make a difference; you just need a system that actually works in the real world without demanding all of your free time. As you watch that organic matter transform into rich, dark soil, you’ll realize that the real reward isn’t just the garden fuel—it’s the mental clarity that comes from reducing your footprint and reclaiming control over your environment. Get out there, get your hands dirty, and let the system work.